
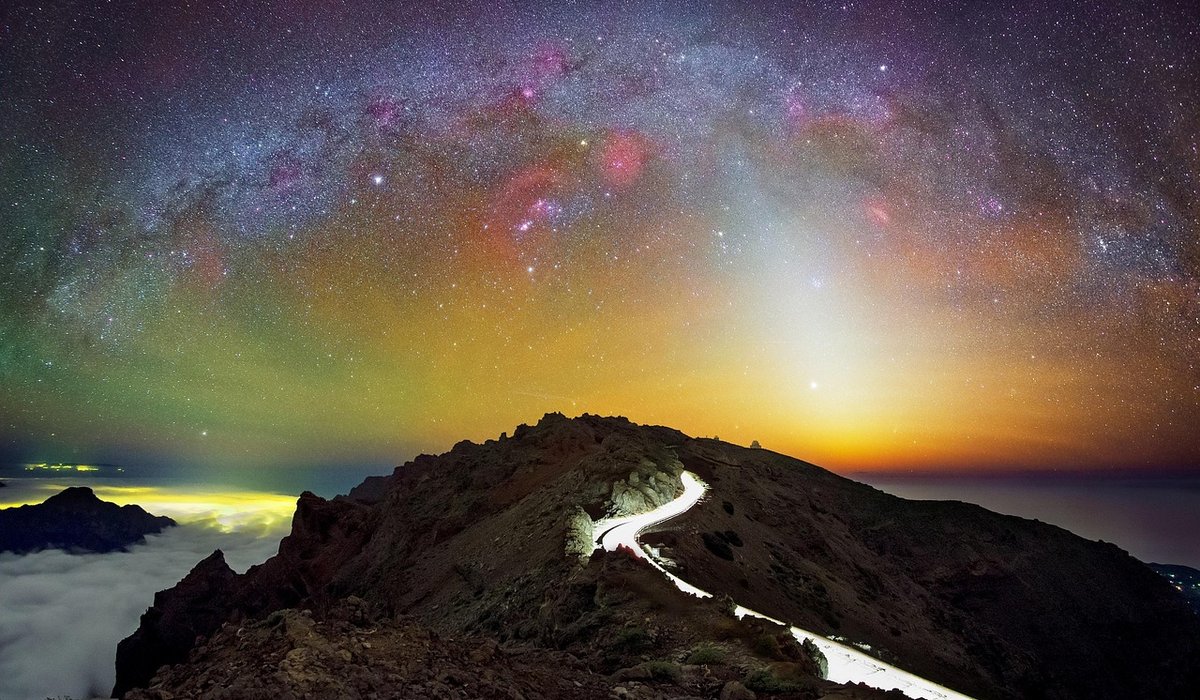
Basic Settings for Milky Way Photography
Why the Milky Way Needs Its Own Settings
Capturing the Milky Way from a UK garden or dark sky park is rewarding, but the galactic core is faint and British skies are rarely perfect. The UK has some of the darkest skies in Europe, from the Highlands to the South Downs, but you can practise in your back garden. You need to squeeze every drop of light from the scene whilst keeping stars sharp. That means full manual control. Master three settings – aperture, shutter speed, and ISO – then fine-tune white balance. Once you have a starting point, adapt it to your lens, camera, and location.
Aperture: Open Wide for Maximum Starlight
Your aperture controls how much light reaches the sensor. Use the widest opening your lens allows. Dedicated wide-angle lenses often offer f/2.8 or wider, and that extra light makes a huge difference. A kit lens at f/3.5 can still work – use it at its widest focal length where the aperture is largest. Avoid stopping down unless your lens is soft wide open; a slightly softer image with more light beats a sharp but starless frame. In the UK, light pollution brightens the sky, so a wide aperture helps keep ISO lower and noise down. Remember that full-frame sensors gather more light than crop sensors, so you may need a wider aperture or higher ISO on a smaller sensor. Test your lens on a bright star: if corners look like little seagulls, try f/4, but only if you can afford the light loss.
Shutter Speed: The 500 Rule and UK Realities
Stars move. Leave the shutter open too long and they become trails. Start with the 500 rule: divide 500 by your full-frame equivalent focal length. A 20mm lens on full-frame gives 25 seconds. On a crop sensor, multiply focal length by 1.5 first – so 20mm becomes 30mm, giving about 16 seconds. In the UK, the Milky Way core sits low in the south, where haze and light pollution are worst. If you are near a town, the sky glow may force a shorter exposure to avoid washing out the Milky Way. I find 15 to 20 seconds safer for crisp stars near the horizon. Use a sturdy tripod and a remote release or two-second delay. For faint detail, take several shorter exposures and stack them later – but for a single frame, start at 20 seconds and zoom in to check for trailing.
ISO: Balancing Noise and Detail
ISO amplifies the sensor signal. Too low and the Milky Way stays buried; too high and noise ruins the shot. Start at ISO 3200. Adjust in full stops: 1600, 3200, 6400. Every camera has a sweet spot where read noise drops and dynamic range holds up – often between 1600 and 6400. Some cameras have a dual-gain ISO where noise drops dramatically at a specific value, so test yours. In UK skies, light pollution adds a glow that limits how far you push ISO. If test shots look washed out, try ISO 1600 and double shutter speed (watch for trailing). If too dark, go to ISO 6400. Always shoot RAW so you can lift shadows and reduce noise later. A slightly noisy image with a visible core beats a clean empty sky.
White Balance: Bringing Out the Galactic Core
Auto white balance is a gamble at night, often giving muddy orange or cold blue. Set it manually and test. Start with daylight (around 5500K) for a neutral sky, though the Milky Way can look pale. Next try 3800K to 4200K – this warmer setting enhances yellow and orange tones in the galactic core, making dust lanes and star clouds stand out. Tungsten (3200K) gives a deep blue sky but may over-warm the core. Take three or four shots at different settings and compare on your camera screen. If you shoot RAW, you can change white balance later, but getting it close in-camera helps you judge focus and composition. In the UK, a slightly warmer white balance often cuts through haze and light pollution.
Your First Night: A Practical Starting Recipe
Put it together. Manual mode. Tripod. Wide-angle lens at its widest aperture. Turn off image stabilisation. Manual focus: switch to live view, zoom in on a bright star, and turn the focus ring until it is as small and sharp as possible. Use a remote release or two-second timer. Then set:
- Aperture: f/2.8 (or your lens's widest)
- Shutter speed: 20 seconds
- ISO: 3200
- White balance: 4000K
Take a test shot. Too dark? Increase ISO to 6400 or open aperture wider. Stars trailing? Reduce shutter to 15 seconds. Colour wrong? Try 3800K or 4500K. Be patient: UK skies rarely give up secrets first try. Let your eyes adapt to the dark for at least 20 minutes. Wrap up warm, bring a flask, and enjoy the quiet. The Milky Way is waiting.
tag: Astrophotography

Eleanor Hartley Author
Capture multiple exposures of the same scene, then combine them with free software to create a cleaner final image.
YOU MAY ALSO LIKE
Stacking Images to Reduce Camera Noise
Jun 30
10Research official dark sky reserves, national parks, and remote coastal spots, then check access, facilities, and local weather forecasts.
read more
Finding Dark Sky Places Across the UK
Jun 26
10Shield outdoor lights, use warm bulbs, and direct beams downwards to improve your night vision and views of faint objects.
read moreStargazing
-

ERRIC CATONA
Discover how artificial light affects moths, bats, and migrating birds, and how simple changes can support healthier local ecosystems.
May 19, 2016 at 5.12 pm
Reply
ERRIC CATONA
Learn a simple method for locating Polaris using the Plough, then use it to navigate the night sky throughout the year.
May 19, 2016 at 5.12 pm
Reply -
ERRIC CATONA
Set up a comfortable viewing spot, choose a few easy targets, and learn how to read a basic star chart without expensive equipment.
May 19, 2016 at 5.12 pm
Reply
Telescopes
Your email address will not be published.